Remodel, phase 2
Phase 2 began in Arpil 2007: expanding the kitchen. Phase 2b was the tile entryway, begun in December 2007, and completed JUST in time for a graduation open house in May 2008.
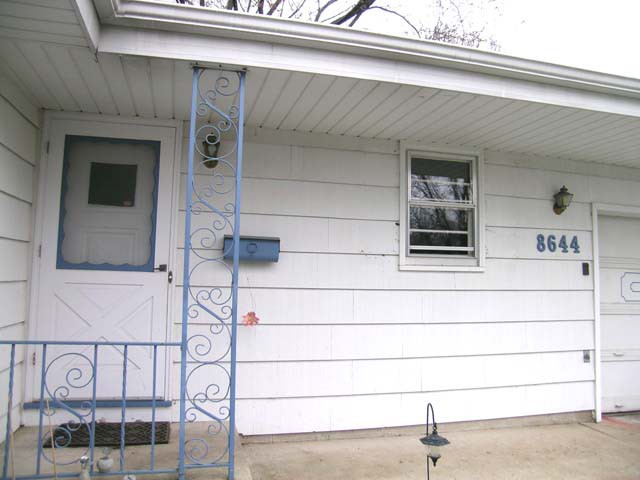 We removed the shutters in anticipation of the window being replaced. It will be wider, and moved to the left, centered on the room.
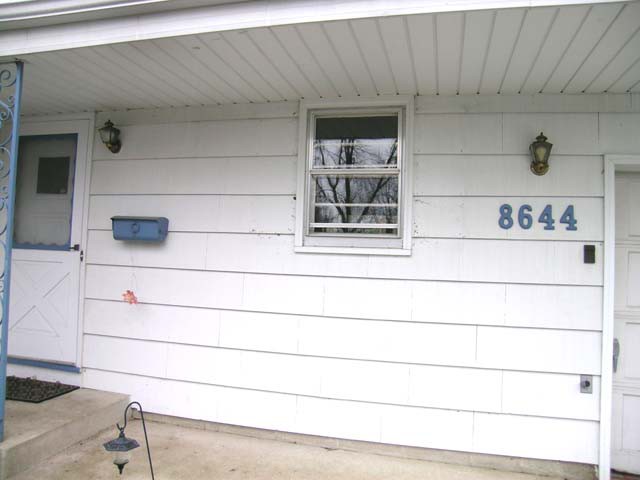 I didn't bother to clean off the spider webs and old wasp nests, as the siding will be removed to accomodate the new window.
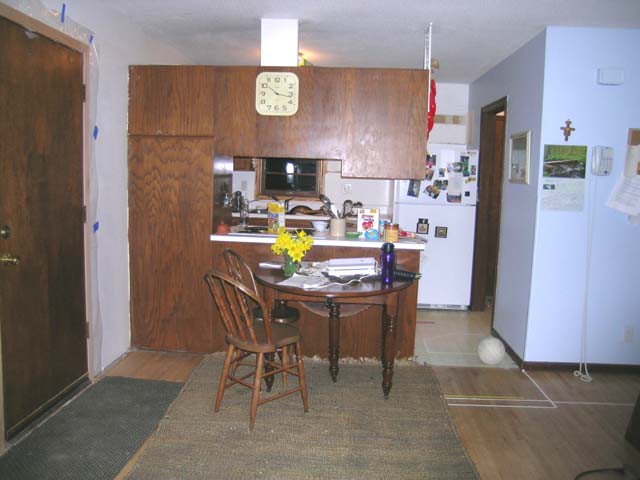 From the new dining space, this is our starting point. The peninsula will be removed to accomodate the new counters. We'll do most of the demolition to keep costs down.
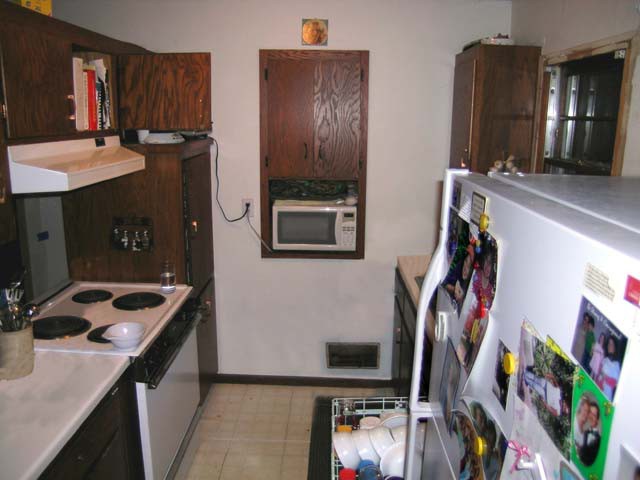 From the main entry, this is the old view. The cupboard embedded in the wall (actually protruding into the garage) will also be removed and the wall restored.
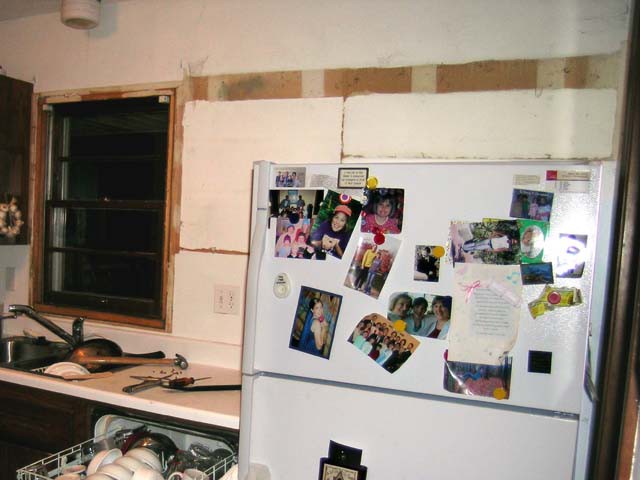 We started by removing the cupboards above the dishwasher and refrigerator. It looks brighter already!
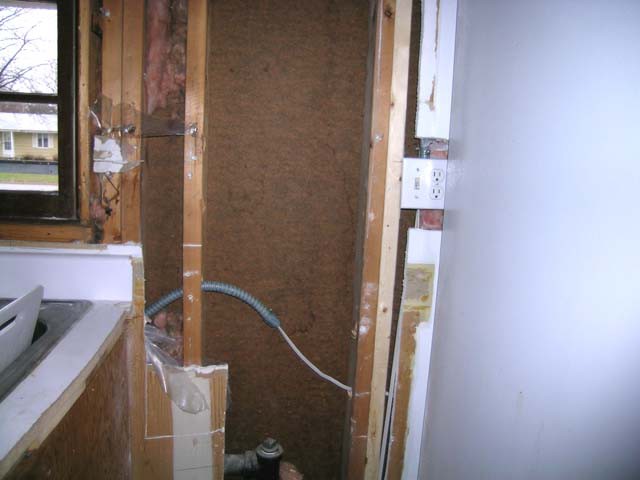 We then removed the dishwasher and part of the old counter to allow access to the wall. The vent for the sink drain has been removed. It will detour around the new window. (Of course, we've had nothing but rain since it was removed, so we had to cover the pipe through the roof so the inches of water wouldn't bathe the kitchen!) The disposal switch and outlet were also moved.
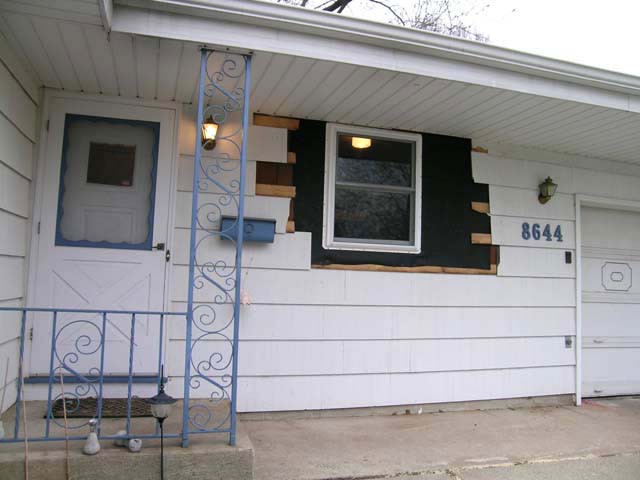 The contractors took out the old window and installed the new.
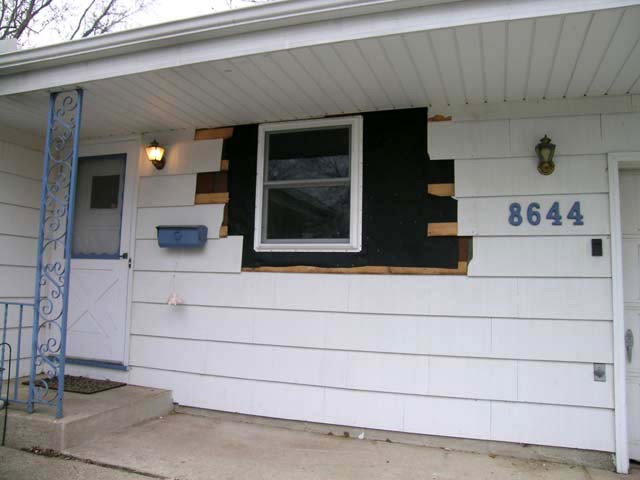 It's wider than the original, and closer to the front door.
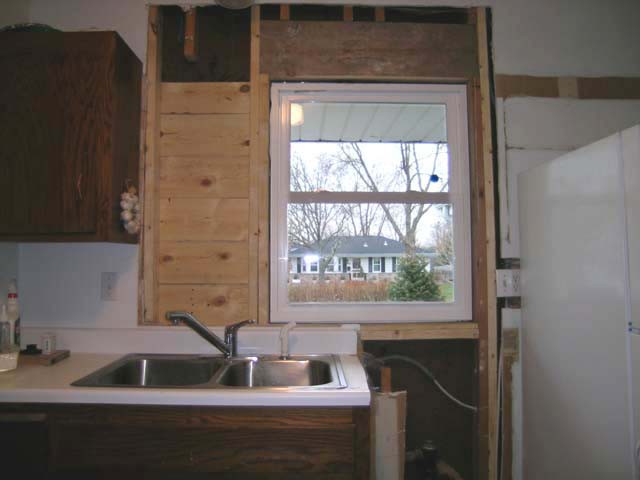 The window was roughed in and left for a few days. We still had our sink (and water!), and the rest of the kitchen (including the stove?still connected, although I had moved it off to the side). We wanted to wait as long as possible before we started "camping."
 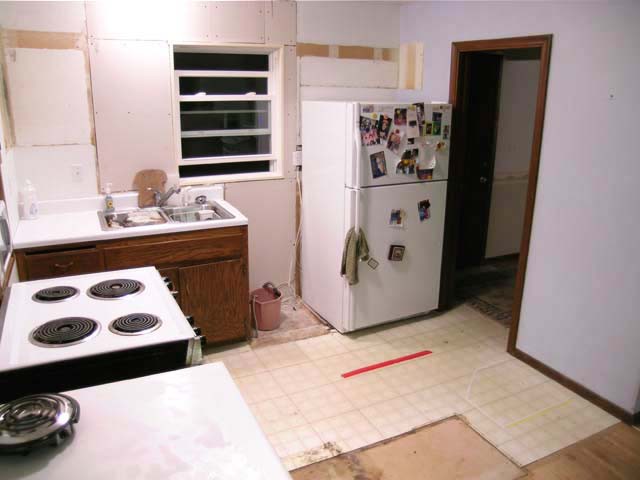 In anticipation of the once-a-year "curbside pickup" program in Bloomington, we wanted to get as much of our cabinets, including up to two appliances (stove and dishwasher) out for "free" disposal. We actually pay for the service, and it's a big deal, with scavengers cruising the streets "shopping" for "one man's trash." Mike and Austin Wilder helped with the demolition, which was a GREAT help. (Thanks, guys!)
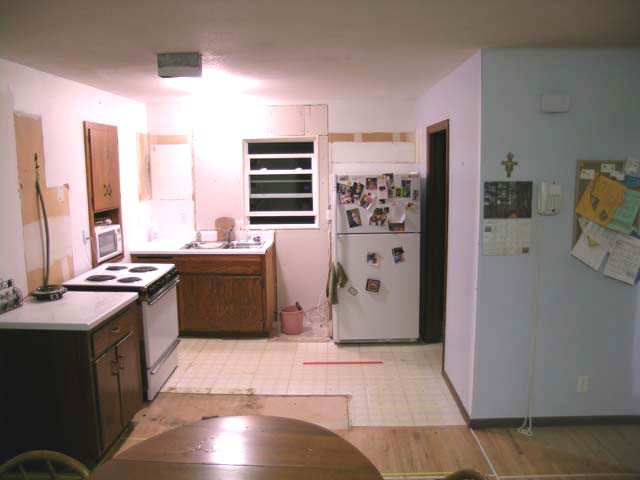 The contractors also came and covered the roughed-in opening so we wouldn't be exposed to insulation while we awaited the delivery of the cabinets. The plan was to have them come a week or so before cabinet installation.
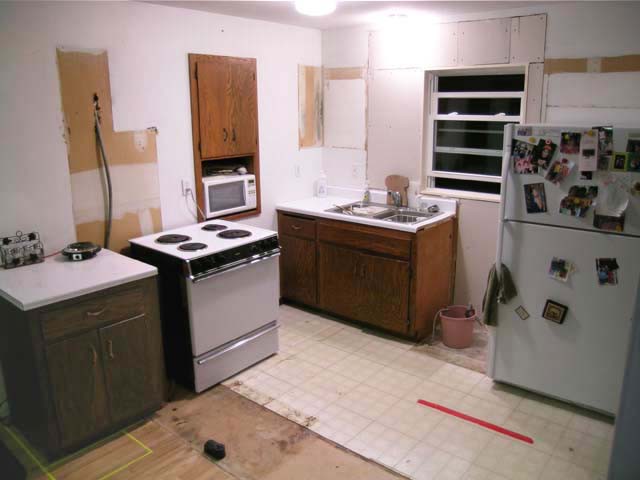 You can see that I've left half of a cabinet so we had some work space during the interim. However, as curbside pickup neared, and we began to think through the detials of what needed to be done before the cabinets arrived, we asked for the plumber and electrician to come so we wouldn't be doing everything at the last minute...
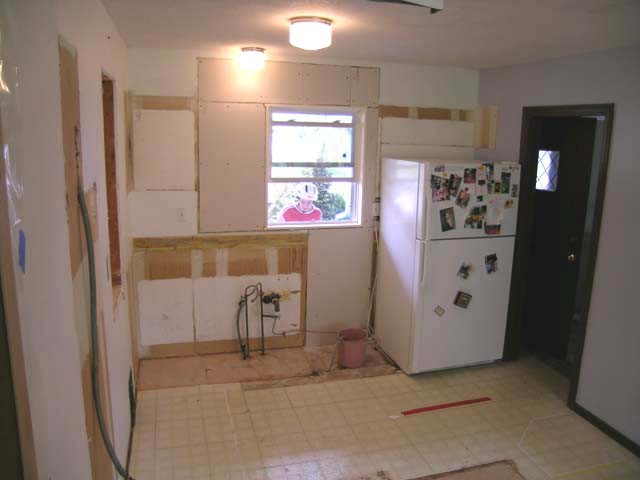 We managed to get all the cabinets disassembled (flat with nails pounded down, per city instructions) and out to the curb by Friday evening.
 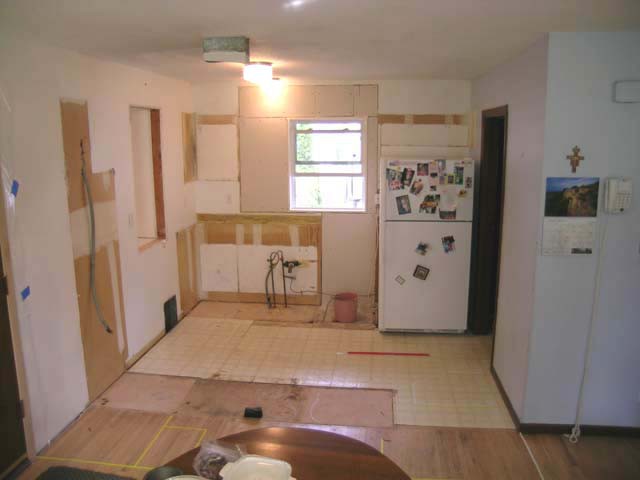 That meant that we were without water, and without stove: just like camping in our own home. Judy escaped to San Diego for a few days to visit her mom, and I began to open up the walls to give the electrician and plumber access.
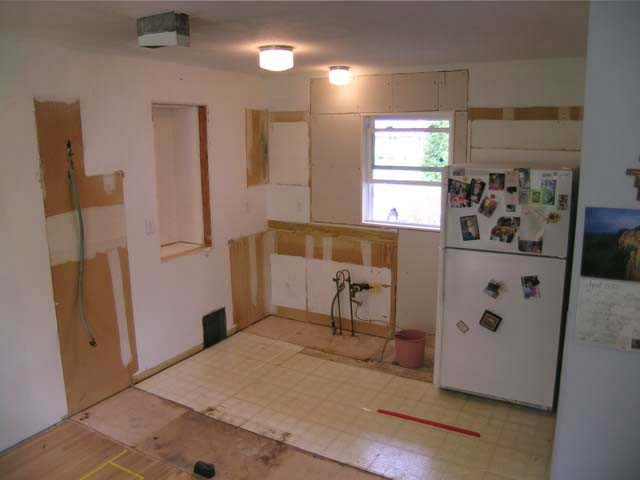 We left the refrigerator in place as long as possible to make ice cubes, of which Judy likes to have a good supply. We managed to get three gallon bags filled before we had to disconnect the water supply.
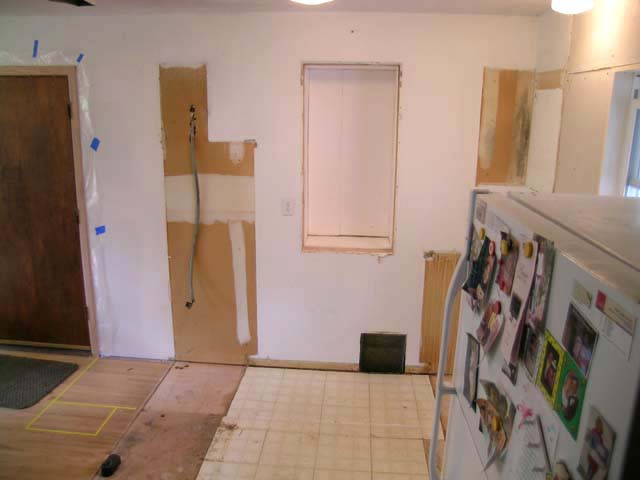 You can see that the cabinet in the wall (it actually hung out into the garage) has been removed, though I left the styrofoam in place to keep bugs out. Also the heat register has been removed and opened up; the hot air will be directed under the cabinet base to a grill in the kick plate.
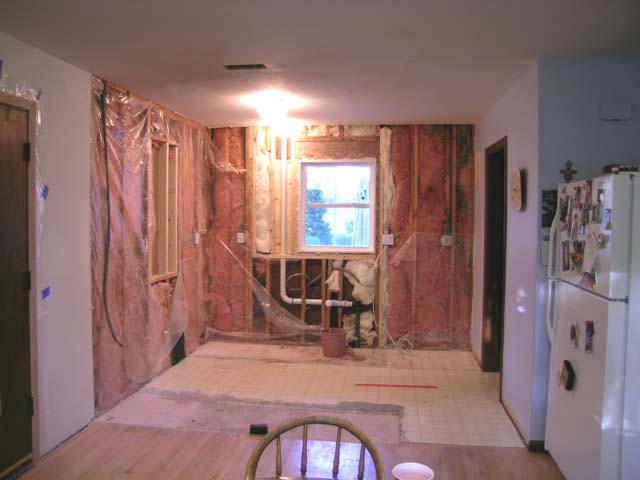 All the drywall has been removed. The insulation is pretty dirty, so we'll have them replace it all. The sink vent has been installed, and the water supply stubs (under the window, behind the bucket). I was surprised that they went the long way around the left side of the window, rather than up the right side.
 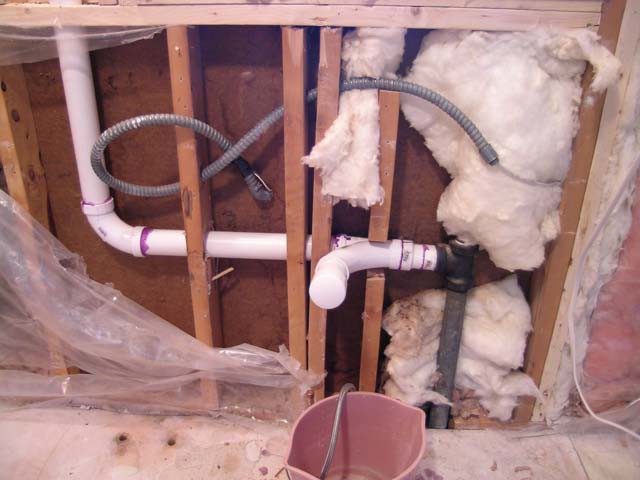 Detail of the sink drain and vent. The disposal feed is tucked into the wall. They'll put a box and outlet in the wall rather than hard wiring it in place. Much easier for maintenance; smart!
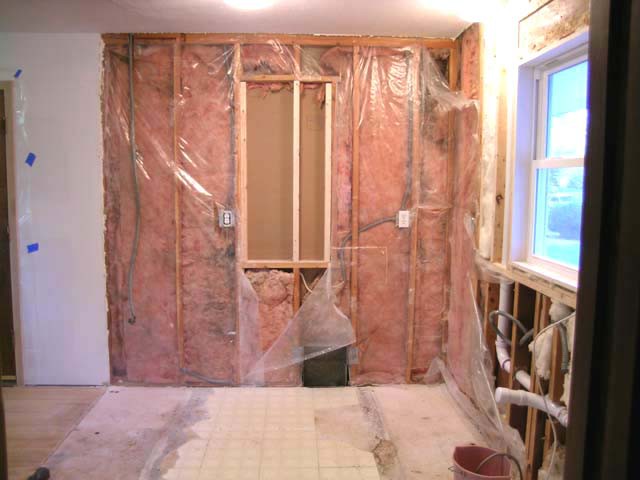 The "wall cupboard" has been framed in. Now we have more wall space in the garage!
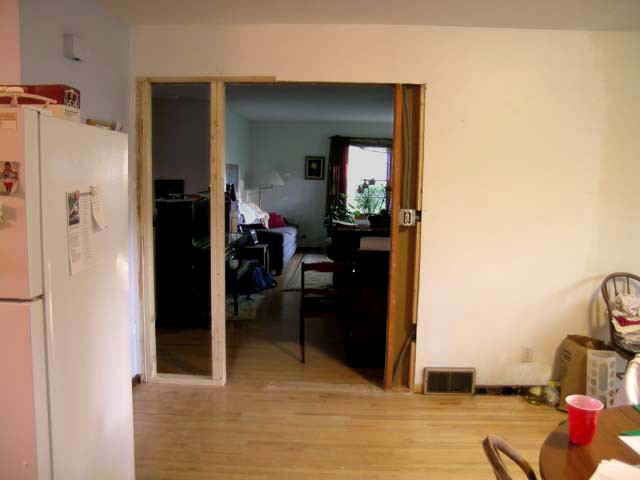 The contractor also helped us decide to remove the pocket door between the dining and living rooms. It will be an open "archway." We resisted the idea at first, but liked it immediately once we started using it.
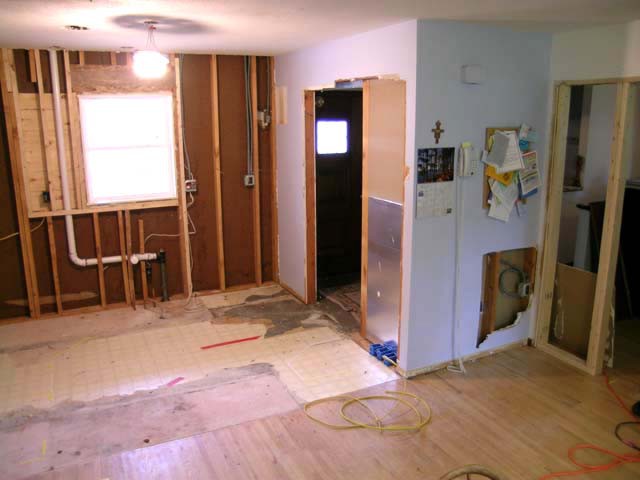 We removed the other pocket door as well. This will make the wall (to be supporting cabinets) stronger, and make it easier to run electricity to the refrigerator and counter on the south wall (where the silver drywall backing is seen). I now know one reason they all groaned when we talked about moving or flipping our pocket doors: they are built in place, and consist of many, many pieces. It would have been no mean feat to get them out and back in. I ripped out all the insulation as well, and have begun working on the old flooring.
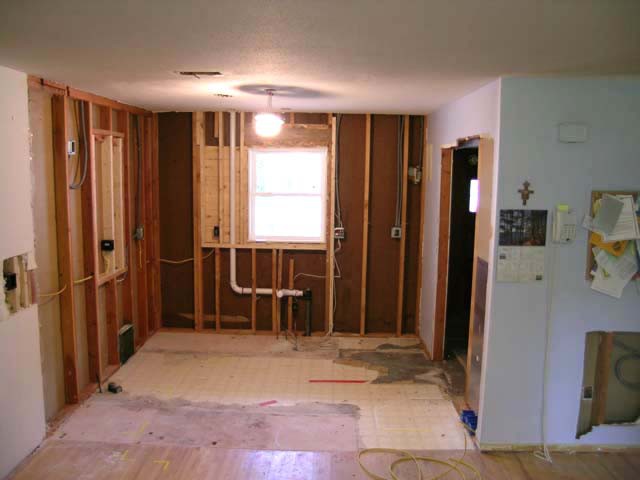 The electrician has wired the outlets and switches for the counters, though the outlets and switches are not in place. Therefore the outlets in the dining room are OFF, and we have no electricity for the refrigerator, nor the microwave (hardly camping, eh?), nor the toaster, nor the coffee pot. We have strung a long extension cord from the back of the house, and unplug the fridge whenever we need one of the other devices.
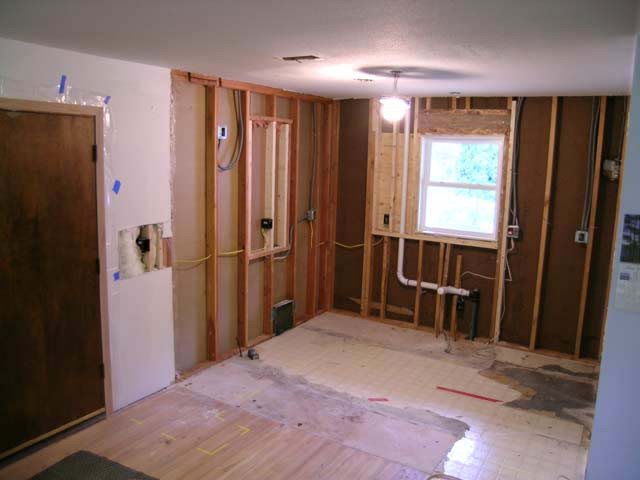 I'll be interested to see how well we guessed where the microwave/stove hood go, and whether we'll be able to accomodate the vent into the garage (as the contractor has planned). It seems the outlet box and conduit (high on the north wall) might need to move a bit...
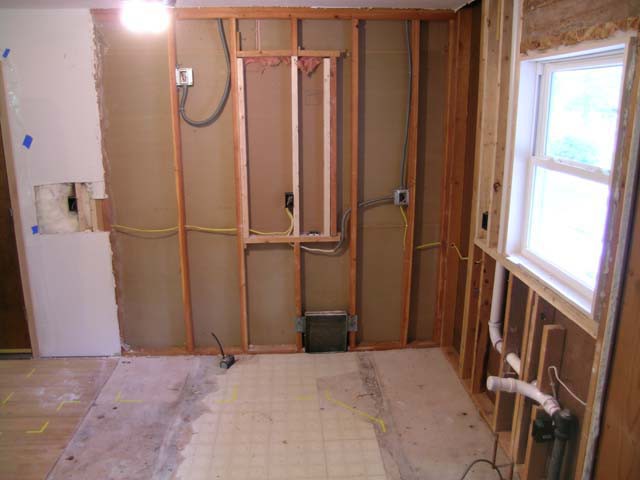 We are sort of flying by the seat of our pants... We just guessed where the kitchen light should go. We'll soon see how effective our guess was.
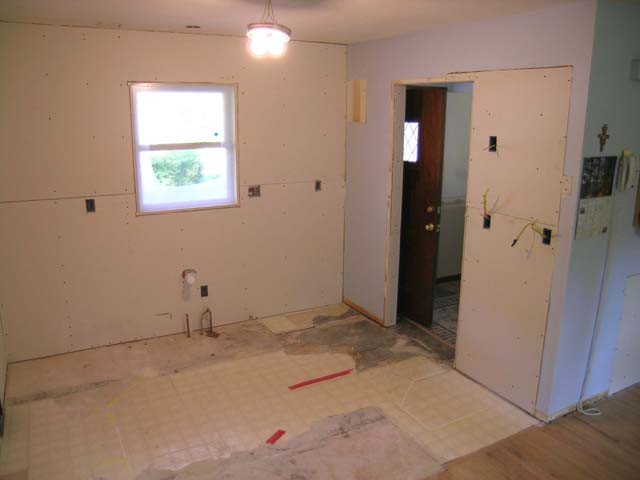 Lickety split, no sooner than the wiring was done and we were surprised by the guys showing up to do the drywall. They completed the wall where the pocket door was, and installed boxes, then pulled the wires through.
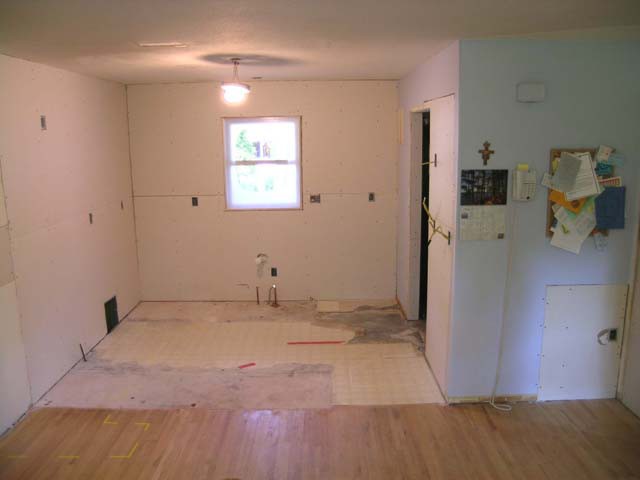 So now we can see more what our new space will be like.
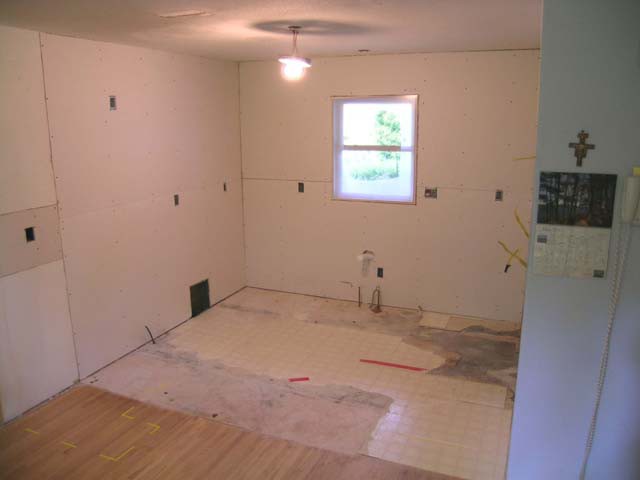 The "taper" will be along tomorrow to tape and mud the seams.
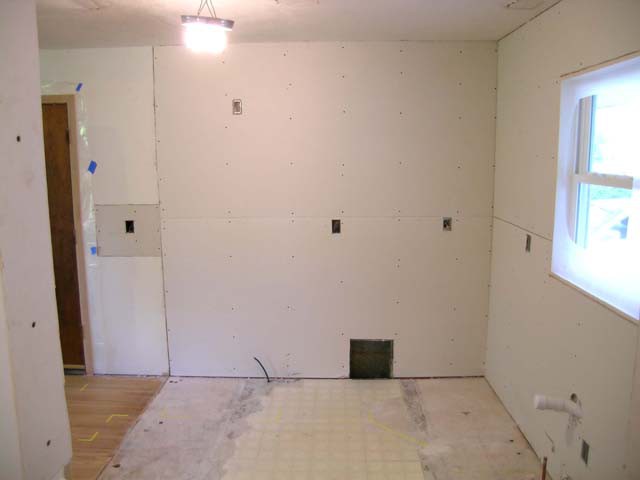 The view from the front entry.
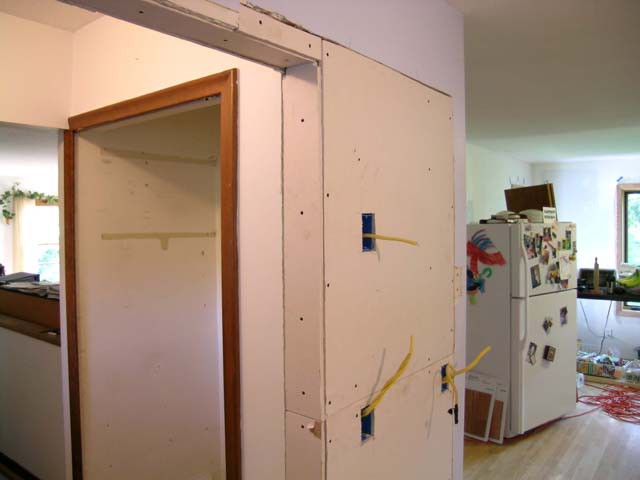 Here's the detail of the new wall where the pocket door used to be. The doorway into the kitchen is about 3" wider than it was before. Notice that we've gutted the front closet in preparation of pulling up the first layer of subfloor (3/4") to replace it with a 1/2" layer, so the entry tile will be the same level as the hardwood.
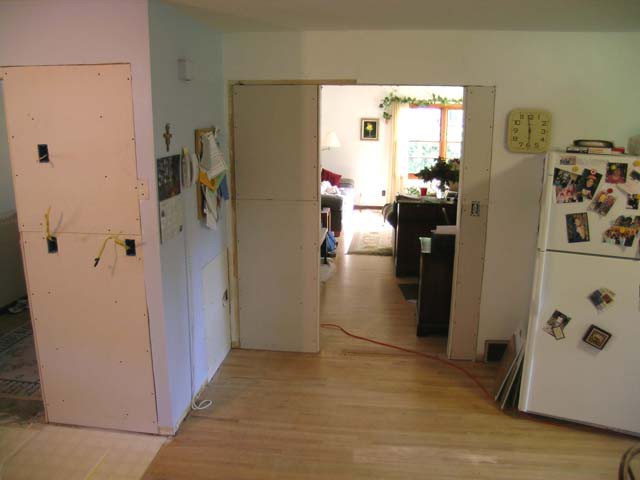 The new view from the back door (to the garage) looking into the living room, through the new opening. We really like the more open feel.
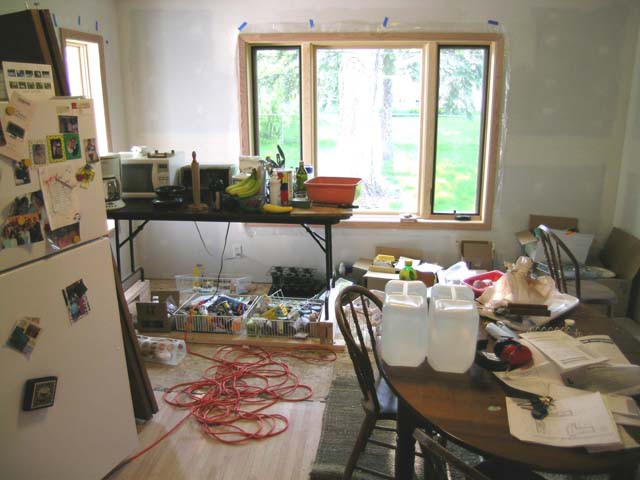 Just for fun, this is what it looks like in our temporary "camping kitchen." We REALLY can't wait for this to be done, though I know we haven't had to endure as long as some.
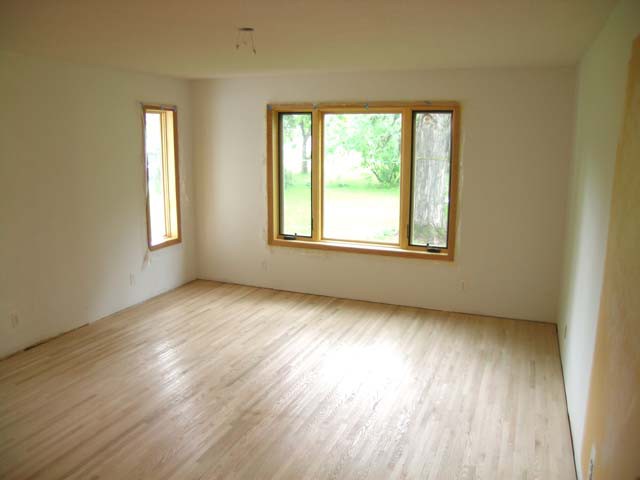 The dining room with completed floors, from the door to the garage.
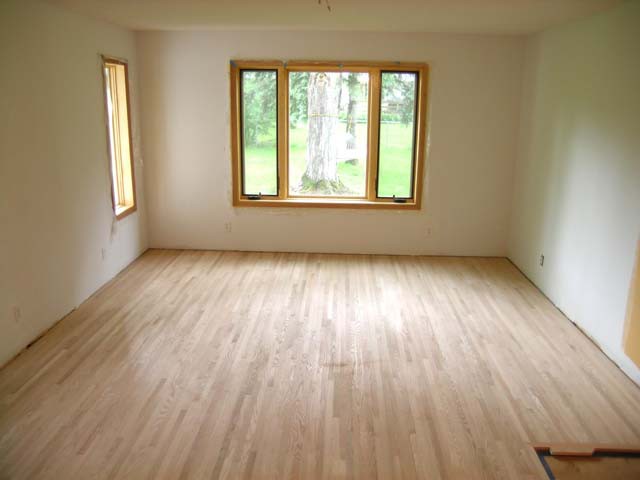 The floors haven't been finished yet, but they will put two coats down starting tomorrow. After the cabinets are installed, they will return for the final coat.
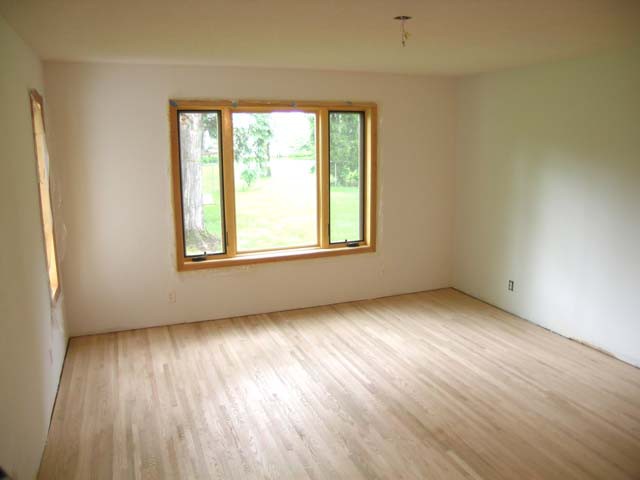 We found some "surprises" in the way the addition joins the original dining room: It's about 1/4" lower than the original level. It should be okay, but it was not what we expected. There's a bit of a ridge where the transition to the new level begins, but you don't notice it (unless you're walking in bare feet and you're looking for it).
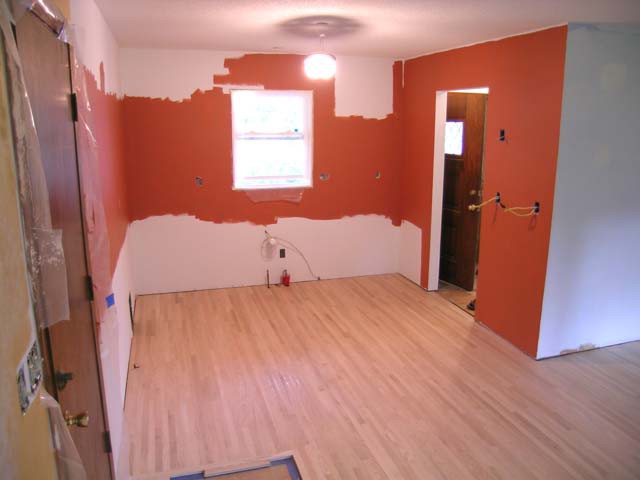 From the door to the garage looking into the new kitchen. You can see we're experimenting with color. We're not finished deciding yet, so stay tuned. This idea is to have color between the cupboards (which will go to the ceiling) and the counter.
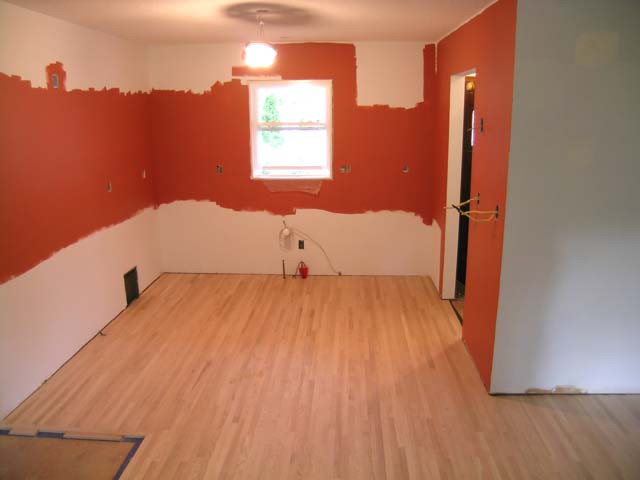 Whatever the color ends up being, we're very excited to get the counters in, so we can begin living (as opposed to camping) again. While they're working on the floors, all the "camping" adjustments have moved to the garage: We go out the front door and into the garage to cook!
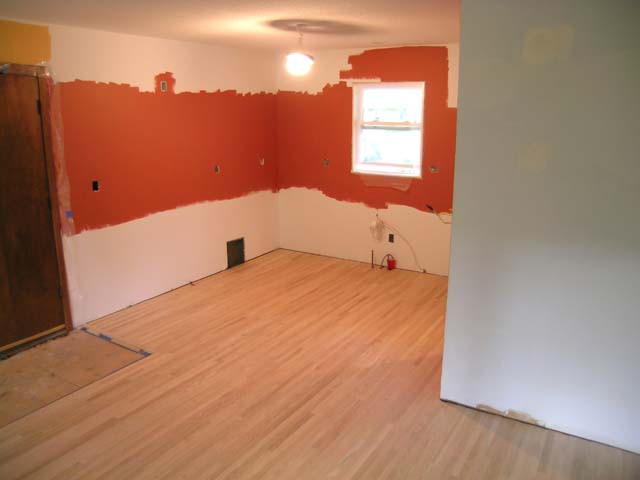 In this view you see a glimpse of the entryway. We plan to lay tile, though we haven't picked anything yet. We're committed now, though, as they put the oak down around the intended space. The wood takes a beating right in front of the door, so we hope to remedy that with the tile.
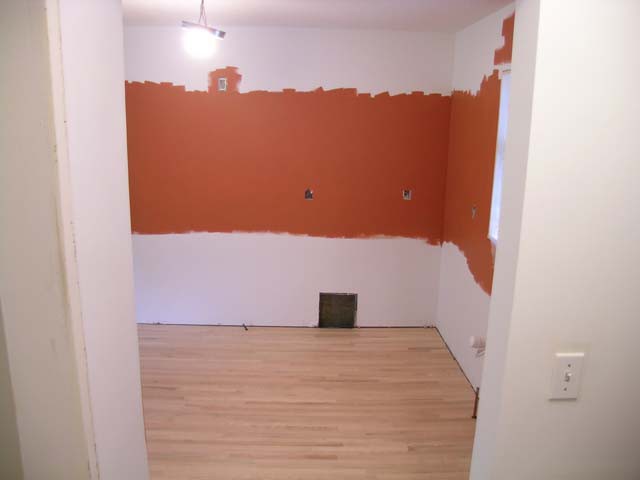 Looking into the kitchen from the front entry.
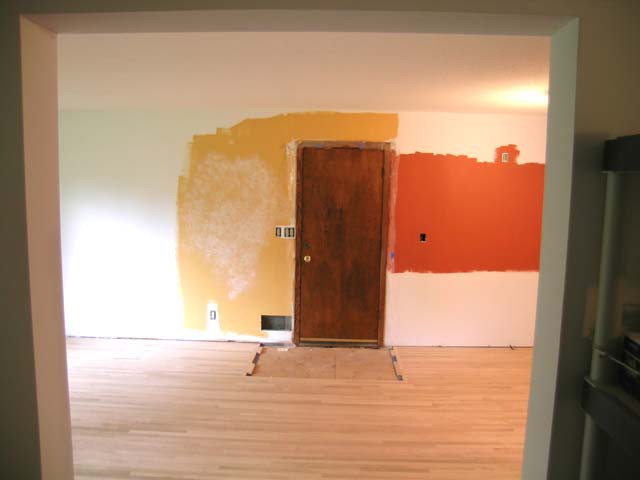 Here you can see that we are experimenting with color for the dining space, too, and with different color treatments. This also is probably not the final color, but we've got a little less than a week to decide. Yikes!
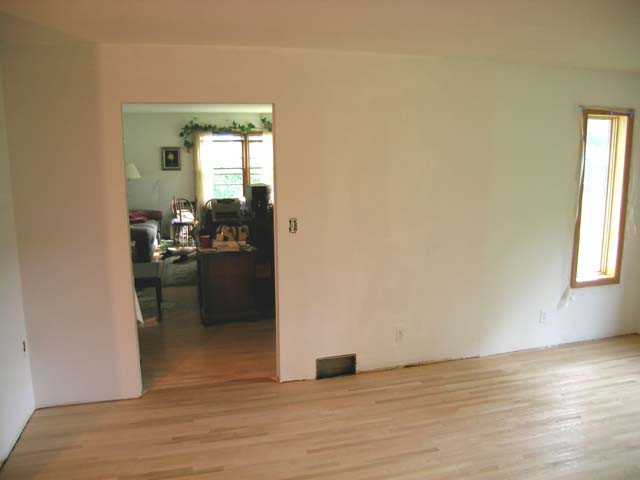 Everything from the kitchen and dining room that isn't in the garage is in the living room or in the basement. It's getting so close we can almost imagine being done.
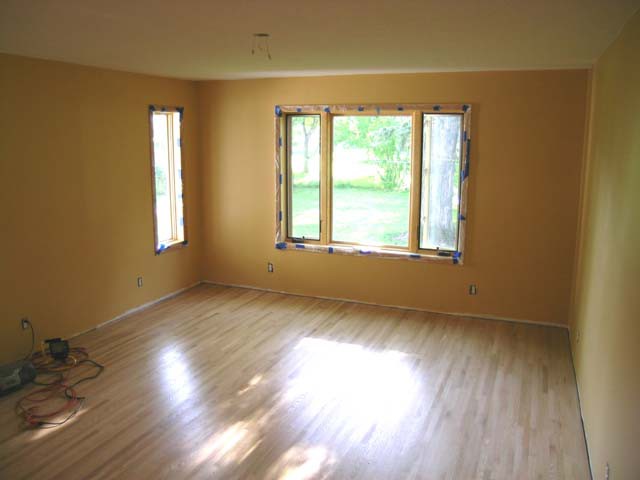 We finally found a color we like. It's called "Roasted Sesame Seed" from Benjamin Moore. The story of HOW we selected it is a bit interesting...
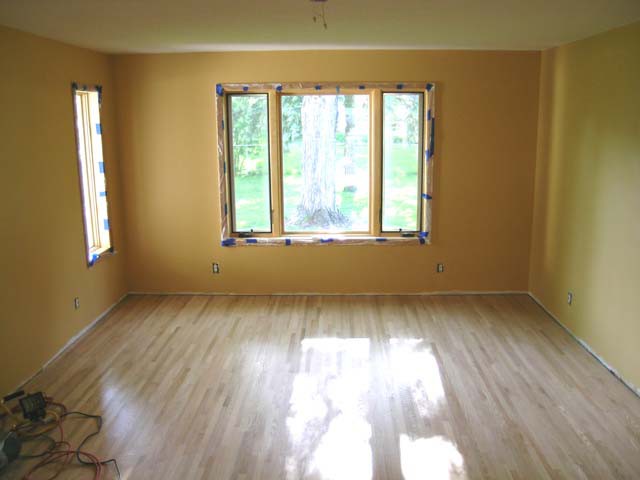 We have been looking at putting a gas fireplace in the right corner. We found one last fall at Fireside Hearth and Home in Eden Prairie. Judy happened to like the wall color in one of their display rooms. After not finding a color we liked using chips, we decided to go to the store and ask them about the color. (We would also show the stove we found for the girls' approval.) They apparently get a lot of questions about decorating: the clerk said, "Just a minute," and went into the back to retrieve a spreadsheet with all the decorating data. He confidently told us it was "Berkley" from Benjamin Moore...
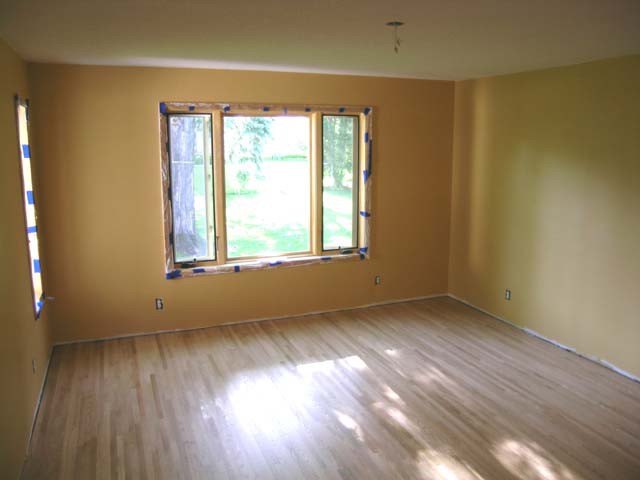 We went to Hirshfield's to request the paint. Alas, that color is not a Benj. Moore color (he knew of a color from another paint manufacturer by that name, but it was much redder). So we decided to buy (rent) two fan books of color chips, went back to the Fireside store, and picked our color against their wall. It wasn't exact, but it's pretty close. Then we returned to Hirshfield's, ordered the paint, returned the fan books (that's how they do it to let them out of the store) and came home to paint. We're very pleased, so it was all worth it.
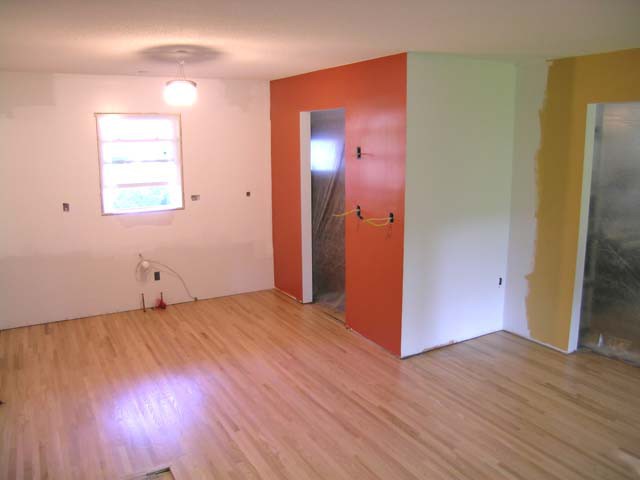 The color in the kitchen hasn't changed from our sample application. What has changed is the way we are using it. Instead of under the cupboards (above the counters) all around, we are putting the color only on the south kitchen wall. It will provide a beautiful splash of color...
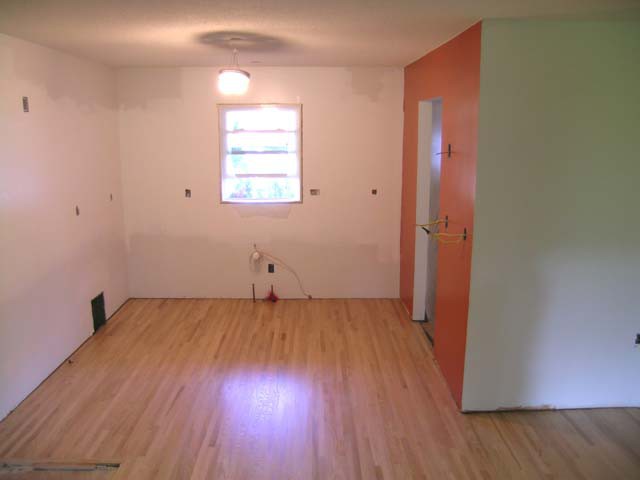 Under the cupboards will be bright white, which will reflect illumination better. Keeping the kitchen bright is a primary goal.
 With our light-colored cabinets, we will then have some additional color in the counter tops, which will now be a granite pattern (laminate) with black, white, and red flecks (red just like our south wall). It should tie together well. It is an adventure, as we've had white counters up 'til now.
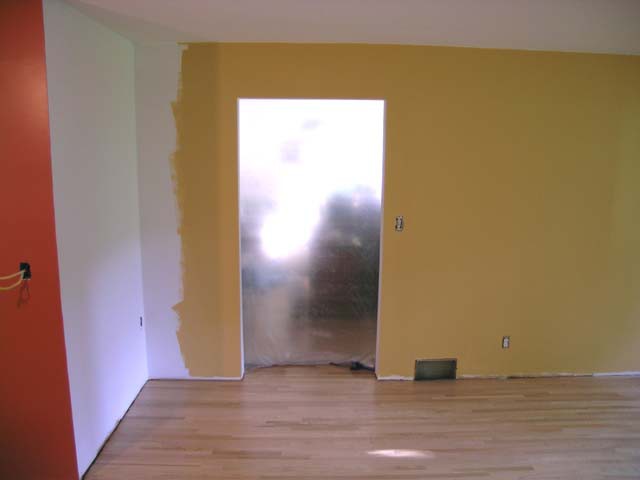 This is looking from the garage door toward the living room. The white wall on the left will be our pantry. The refrigerator will be against the red wall.
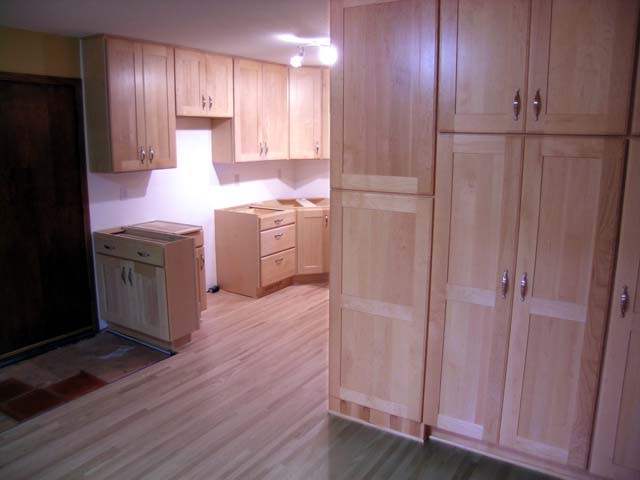 The cabinets have finally arrived and we LOVE them!
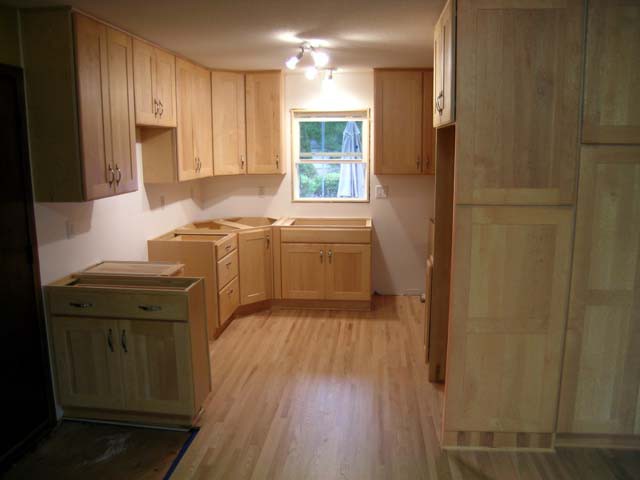 The are beautiful, light, roomy... they look like artwork.
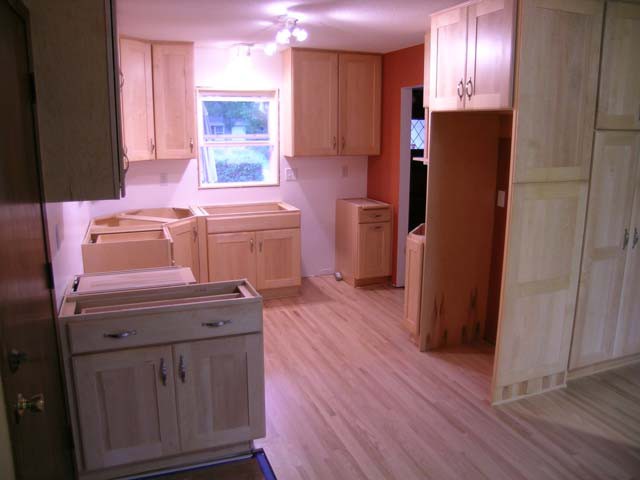 We have so much space, we're not sure we'll be able to fill them. We even had a couple of surprises...
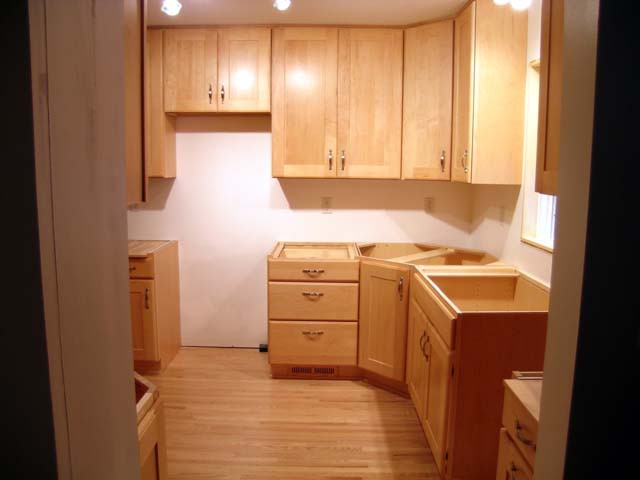 The view from the front door. Now we wait for the arrival of the counter top, and we can move in. (I'll ellucidate the surprises soon.)
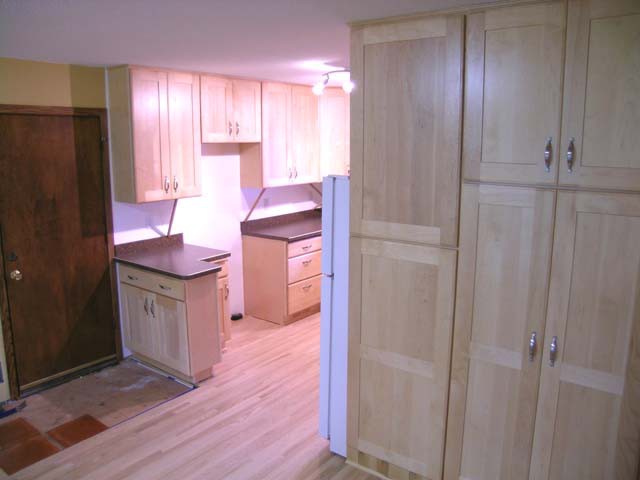 The countertops have arrived! They are an experiment for us, as we have been accustomed to white.
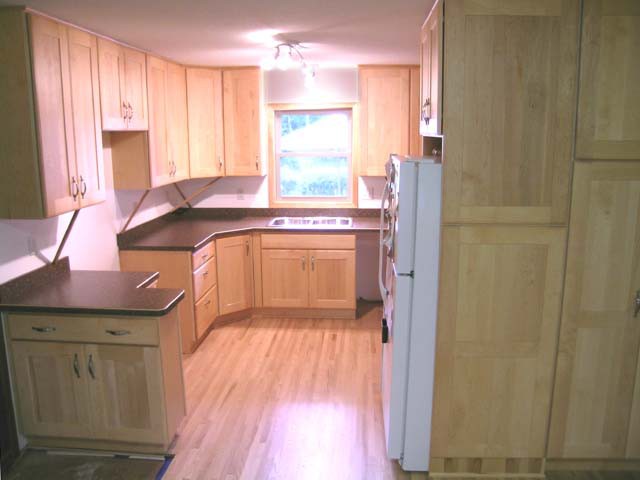 But they are wonderful and provide a contrast to the light cabinets, floors and walls.
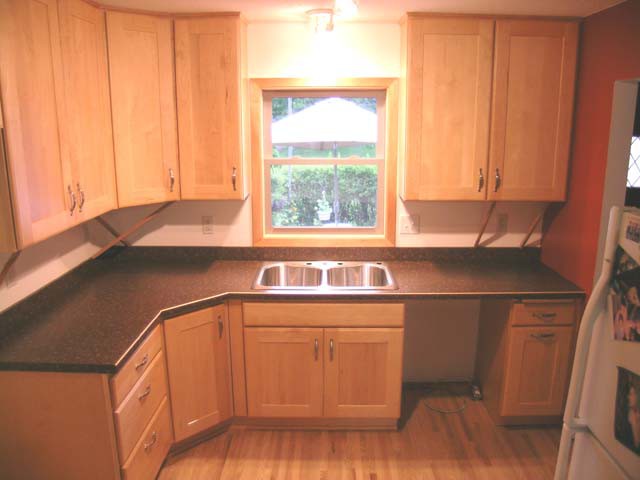 We have much more counter space than we had before. (In the photo, the backsplash is being held in place by props while the glue hardens.)
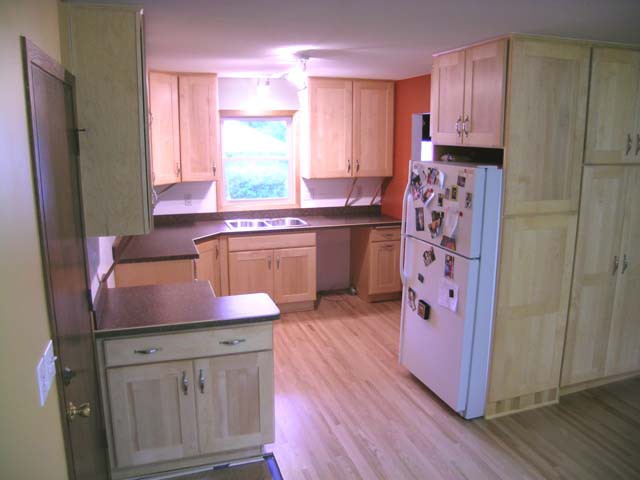 Judy's concern that it would be a "tiny box" when complete have been relieved. It is very open, with plenty of room for us all to be in the kitchen at once.
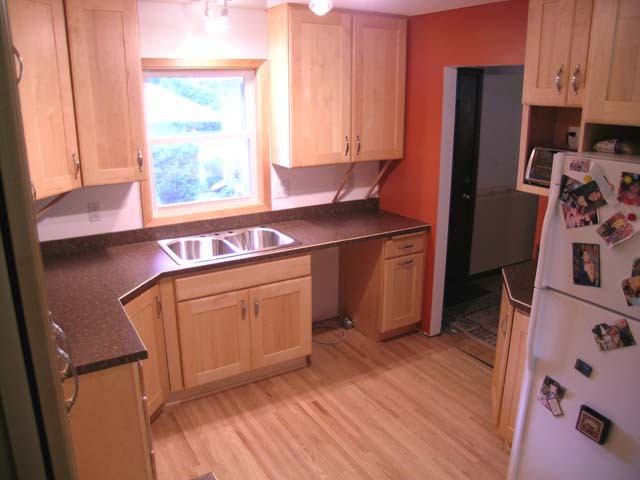 This shot shows the angle cupboard next to the fridge, and the color accent on the south wall. The toaster on the open shelf will be very handy.
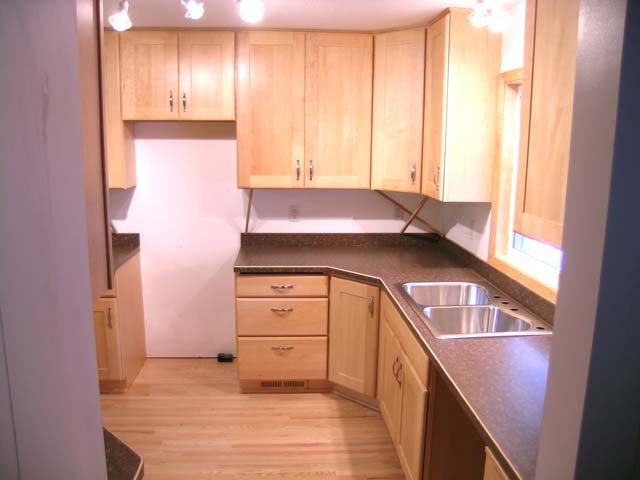 Notice the heat register under the toe kick. It has been very hot this week, so we've had the air conditioning on, and the cool air does in fact come out as intended.
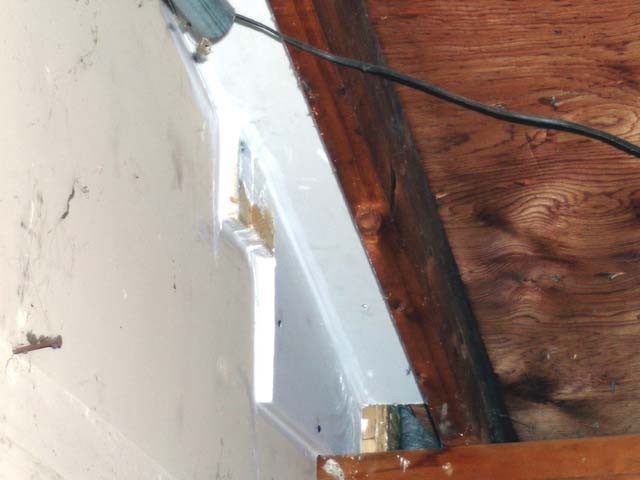 Where the triple beam comes through the garage wall was open (providing a potential rodent pathway) has now been closed with drywall. It's casual (?!) but effective, I suppose.
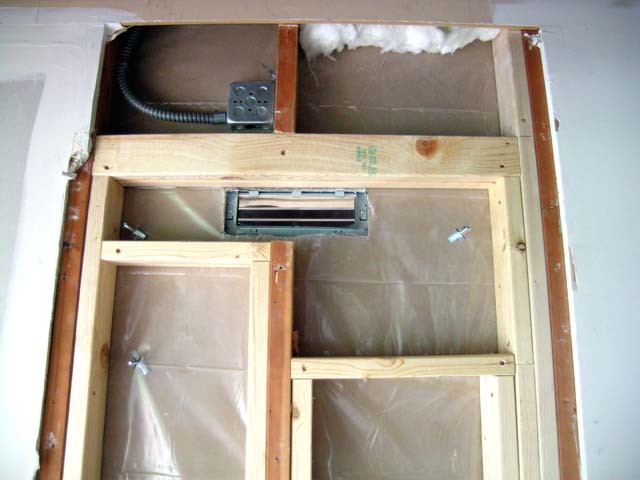 We are going to vent the exhaust fan (over the stove microwave) through the wall rather than up through the cupboards. Installing the microwave led me to discover that there were no studs in line with the brackets, and that the vent would pass through the middle of a stud. This meant opening the wall, putting in a header to span the one interrupted stud, rerouting the conduit (which previously went into the bottom of the box?right where the new header is), and adding a cross member to attach the microwave to. It doesn't look pretty, but it should serve. We're waiting for the contractor to install the vent unit, which will go up the wall and through the garage roof, rather than through the attic.
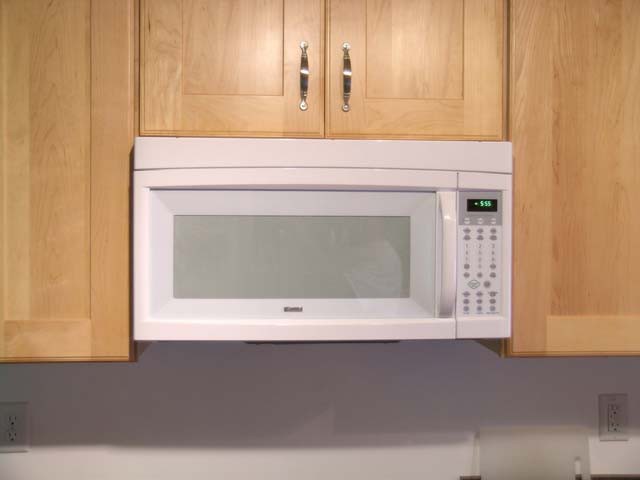 The results on the inside: our new microwave.
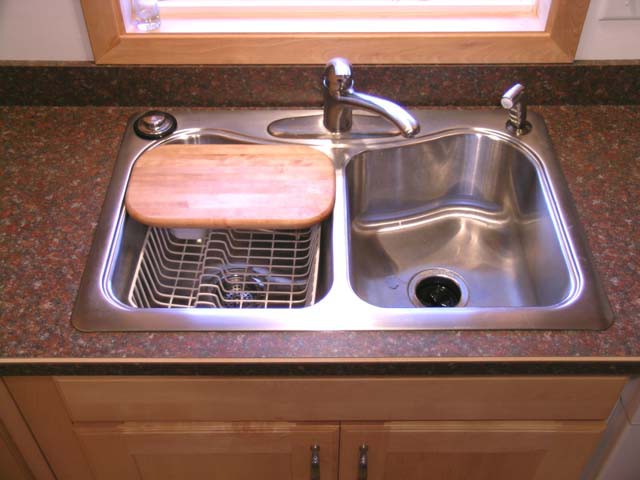 The sink is also in: it's nice and deep, and the odd shape accomodates frying pans with big handles. We switched the disposal to the right (we've had it on the left for 12 years); it has been easier to adapt than we anticipated, though I still find myself wanting to put dirty dishes on the left side rather than the right.
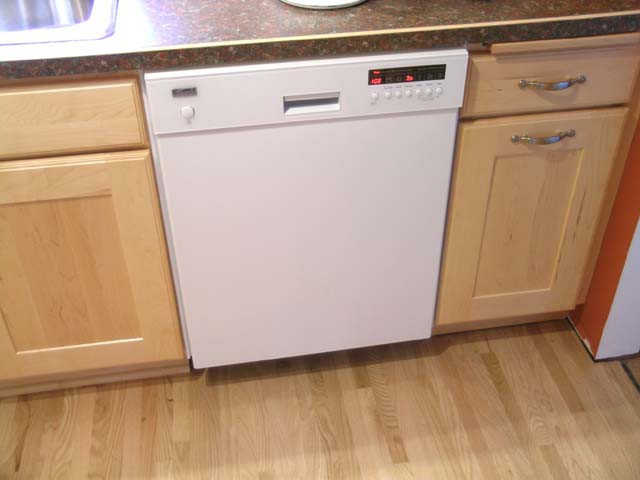 The GREAT news is that the dishwasher is up and running. Of course, it took us a day to find where we put the detergent! But it's very quiet. Now we'll have to get used to loading it: it has a different configuration, and?just as with the sink being on the other side?it will take a while to learn how to get the dishes we use to fit into the racks efficiently.
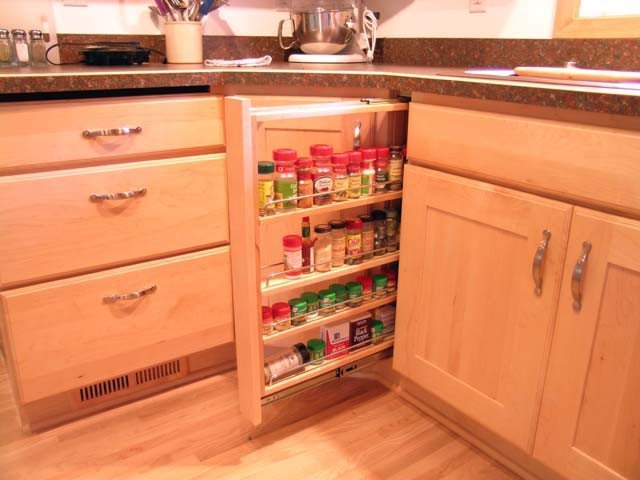 One of the surprises I referred to earlier is shown here: a spice rack built into the lower cabinets. It slides out and is very easy to organize. No more digging through the back of the cupboard for the spice bottle that fell off the turntable... It was a surprise. It wasn't on the plan. The designer had discussed it, but we didn't order it. The installer had actually put a spacer there, as per the design. But as he was looking through all the boxes, he said, "Hey, what's this?" We decided to put it in. It was on the inventory list, even though it wasn't shown on the design. We're waiting for a faceplate to give it a finished look like the rest of the installation.
Another surprise can be seen just to the left of the spice rack: Our big cutting board was not included. The installer actually made a modification to accomodate it; when the countertops came he installed the bracket for it. We're still waiting for the actual cutting board.
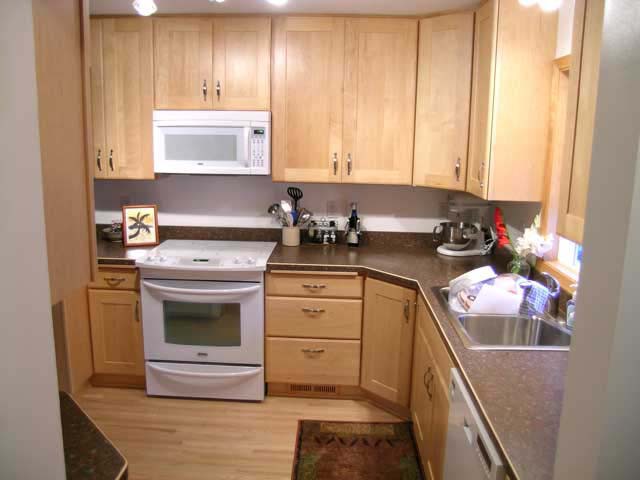 Well, the kitchen is now "fully functional" as Judy likes to say. And these are unretouched photos of how we're living in it, complete with dishes drying in the sink.
 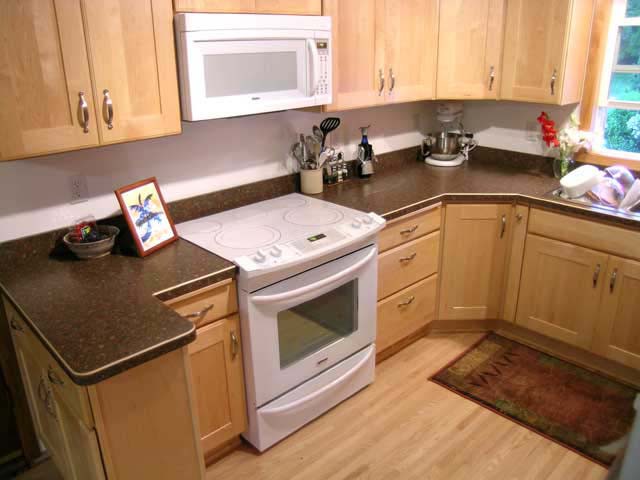 From near the refridgerator offers the best view of our new range. It's a glass-top electric. We had to order a replacement wheel before we could install it. With it, we are officially no longer camping! We're split down the middle on how we like it. Perhaps it will take time for all of us to adjust?and to learn what all those electronic buttons are for.
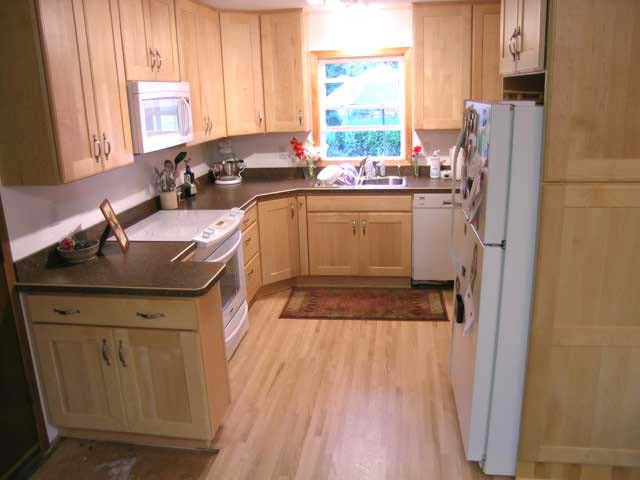 Everything is in place and we are happy with how it turned out. (We occassionally hear a gripe or two about something or another, however.) But there is plenty of room for all of us in there at once. We can all be cooking something and still not bump elbows! We shudder to remember how it used to be.
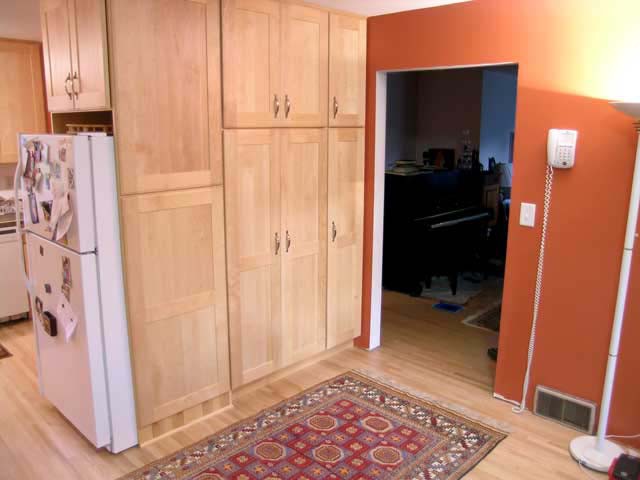 Judy and Anna repainted one of our previously yellow dining room walls (the south one) with the red-orange like the south wall of the kitchen. It's rich and warm and beautiful. (Not that we really want "warm" right now with all the heat we've been having, ... during which time our old air conditioner has finally given up the ghost! Did someone say, "Next project!"?)
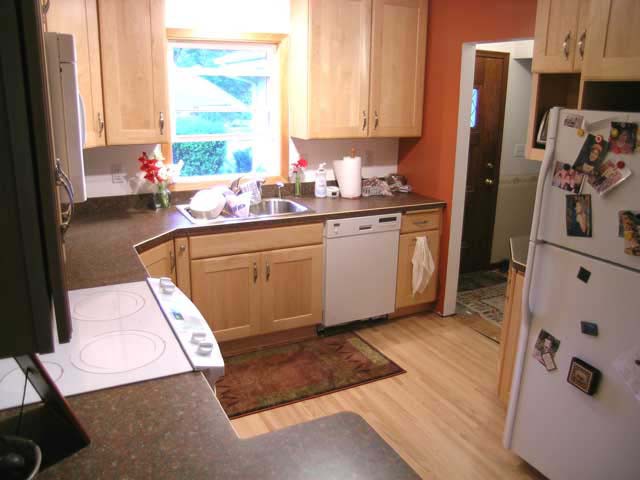 Look at all that lovely counter space! Ahhhhhhhh! And the cupboards are (truly!) only half-full.
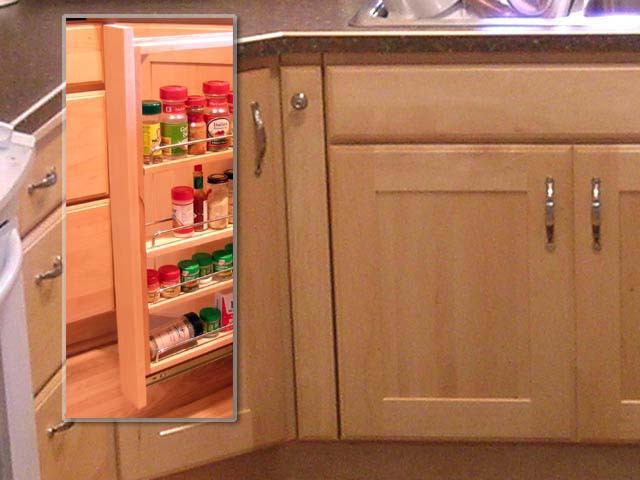 You may remember we had a surprise addition to the plan: a roll-out spice rack. Sadly, the front finish panel didn't ship with the original order (see inset). We ordered another, but it came in a different color, so we sent it back. Now we finally have it, and a knob to boot, so it's much easier to open now.
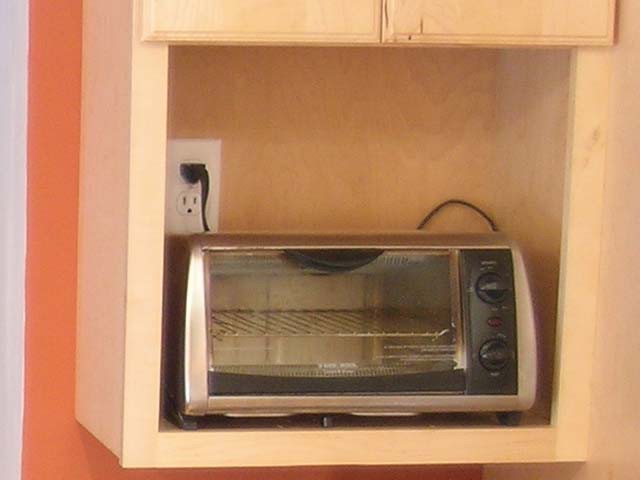 We made a modification to this little cupboard next to the fridge. It shipped with a shelf that stuck out about six inches, but we didn't need it for the toaster (I think it was designed for a much deeper microwave). They said we could just pop the shelf off, but when we did, it was full of nail holes, and didn't look good. The installer put a face on the shelf after sawing off the overhand, and it looks great!
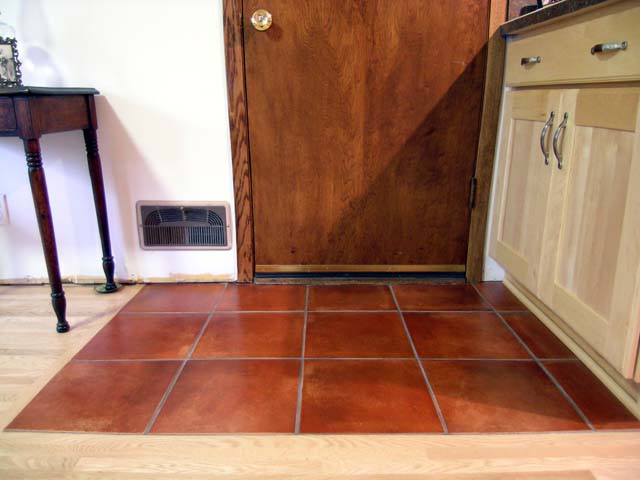 Anna and Rick attended a class on laying tile, and it sounded simple, so we undertook to do the entryways. We started with the rear entry (opening onto the garage) since it is smaller and a simple rectangle. Each step (prep; underlay; tile; grout; seal) took us (we allowed for) a full day, so the entire process entailed a week. But the results are pleasing, and although not perfect (we discovered issues that affect leveling, what to do with edges, and the reality that not everything in a house actually is square/true). So next we will attempt the front entryway and closet. No pressure! Wish us luck.
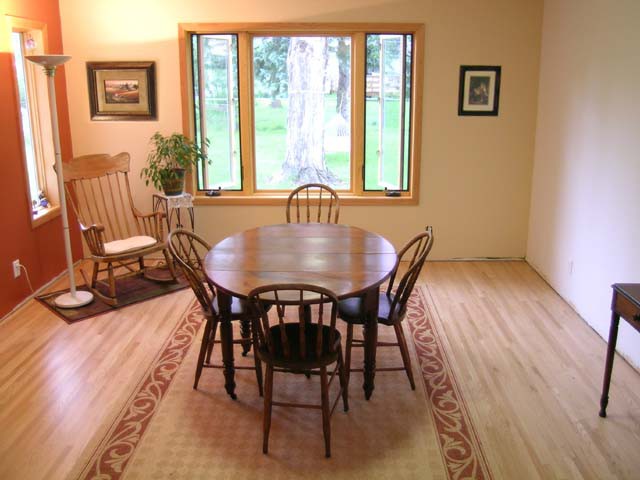 Except for the baseboards (which are being prefinished in the garage) the dining room is taking shape. After SIX coats of paint on the western wall, we have settled on the tint you see below. It's warm, and makes a gentle transition to the white of the north wall. We LIKE it (finally!). We think one of the walls/mud may be cracking, so we're going to have the contractor take a look before we move all the furniture in.
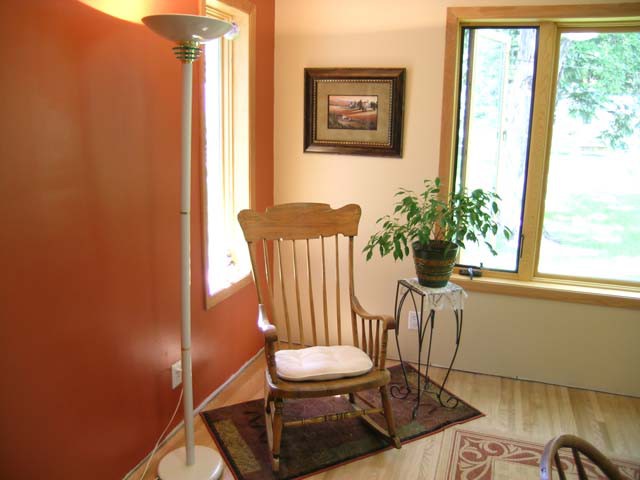 This corner of the dining room is turning out to be a popular one. By chance, the floor light matches our overhead fixtures. It came from Theo's basement, and was on its way to a garage sale when she offered it to us. Perfect! (Thanks, Theo.) The rocking chair, also courtesy of Theo (she moved into a condo and didn't have room for many of her furnishings) was in Grandmother Esther Arens' kitchen in Aitkin, MN. We hope it will be at home here. It is a perfect reading spot, and is very therapeutic for relaxation and recovery from our busy days. Judy found a print that ABSOLUTELY fits the room, and a rug that matches very well (and protects the floor). Now all we have to do is create a calendar so we're not all trying to use the spot at the same time.
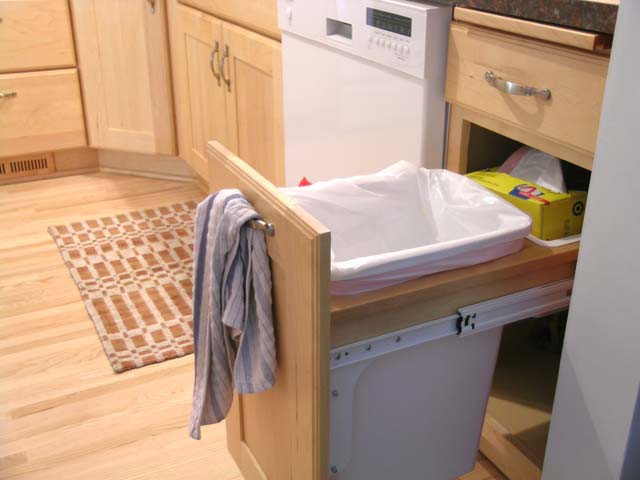 Deluxe bonus favorite benefit of the new cabinets is our built-in trash drawer. No more bending down under the sink (less clutter, too). The cutting board above it is perfect for dicing and sliding remnants right into the trash. Each bag holds more than the plastic grocery bags we had been using. Judy knew she wanted this after seeing it in friends' homes, and she was right. It's GREAT!
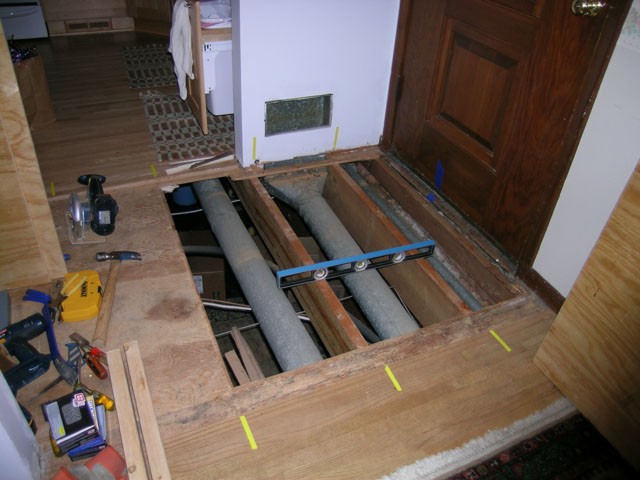 The 5/8" plywood subfloor in the front entry way was pretty flexible, and I was concerned that masonry would crack. In order to reinforce the floor without raising the level of the subfloor, I had to remove the existing plywood from above (the ducting you see prevented my doing this from below).
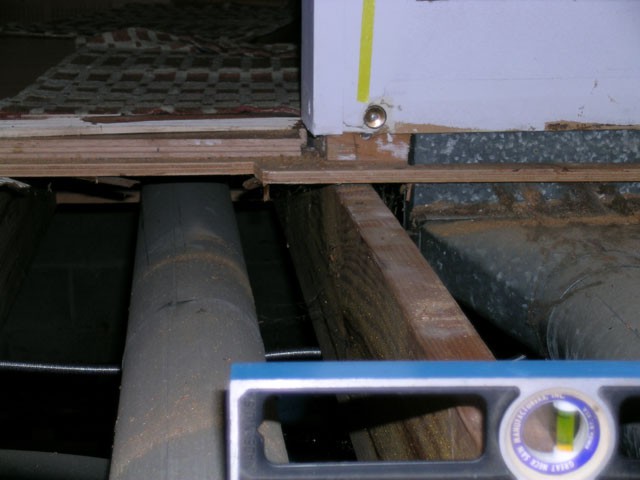 You can see that the subfloor was not entirely supported by the joists. I nailed 2x4 supports to the joists, and cut an additional layer of 5/8" plywood to fit between the joists, supported by the 2x4s. I then replaced the original 5/8" subfloor and screwed it all together. It was much firmer.
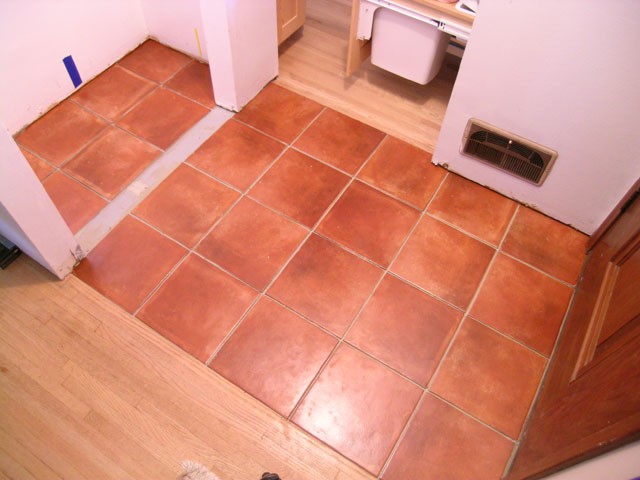 Fast forward to the weeks right before Elise's graduation open house. We had to complete the entryway before opening our home. I installed DensShield? underlayment on the newly reinforced subfloor. (I guess I didn't take pictures of this step. See the gray material at the threshold of the closet.) Notice the tape on the walls marking the position of the seams in the subfloor and underlayment.
Working on my knees proved to be hard on my back, so Anna actually layed the tile. (I layed it out and cut it to fit, discovering in the process that the hardwood on both sides of the entryway was not parallel. We had to cheat with the alignment of the grout gaps, but I think you'll agree that it looks okay. You can only see the misalignment if you site along the grout lines.) Anyway, Anna mixed and spread the thinset, layed the tile, leveled, put in spacers, and cleaned up. She also applied and washed and sealed the grout. WOW!
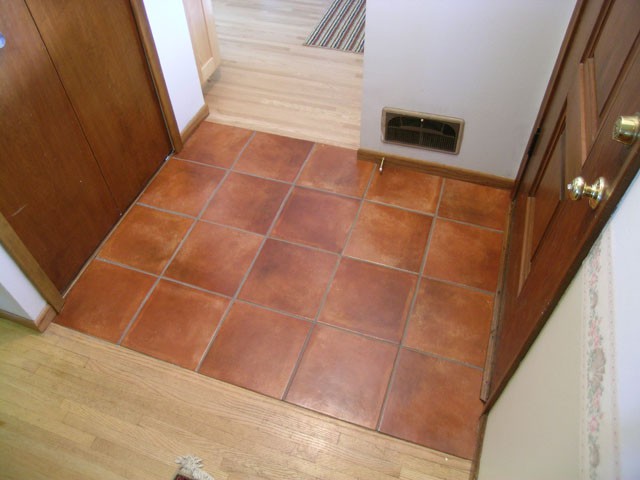 After the grout was sealed, I applied the finishing touches: baseboards and closet door and trim.
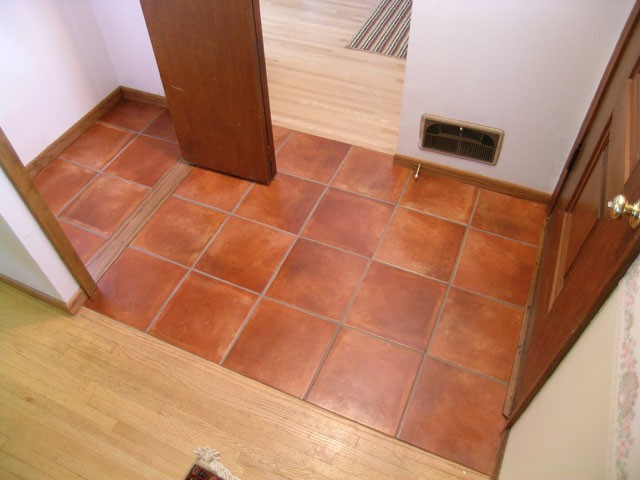 Here you can see the oak threshold we used to install the closet door. I was concerned about putting the hardware on the tile, either scratching or cracking it.
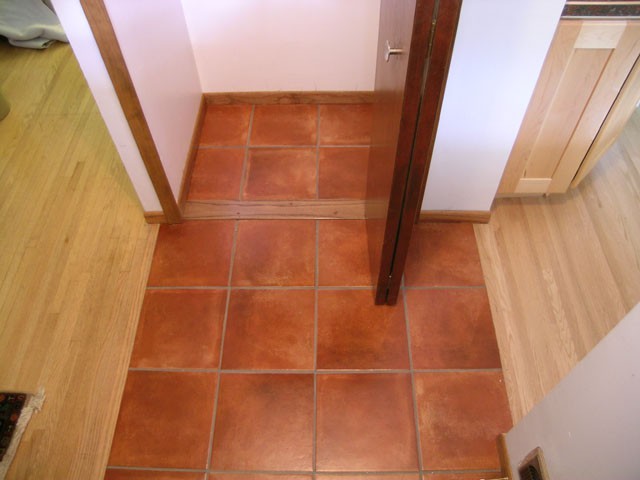 Here you see into the closet. Notice Anna's great tiling!
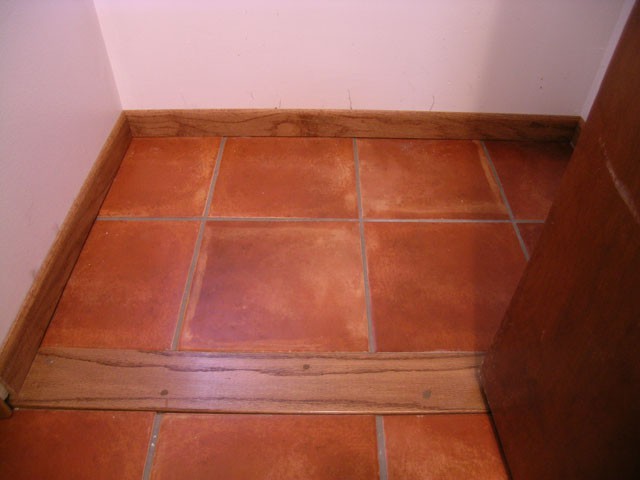 We continued the dark baseboards from the rest of the house into the closet, and transition to the light stain in the dining room to match the kitchen.
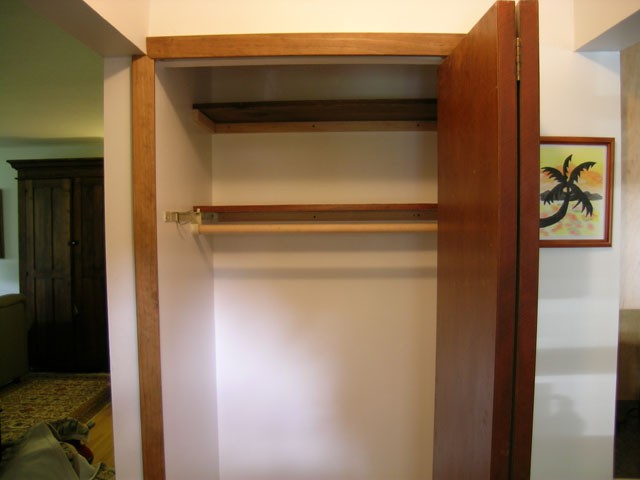 The closet shelves were reinstalled, much more firmly this time. I have since filled the screw holes with putty.
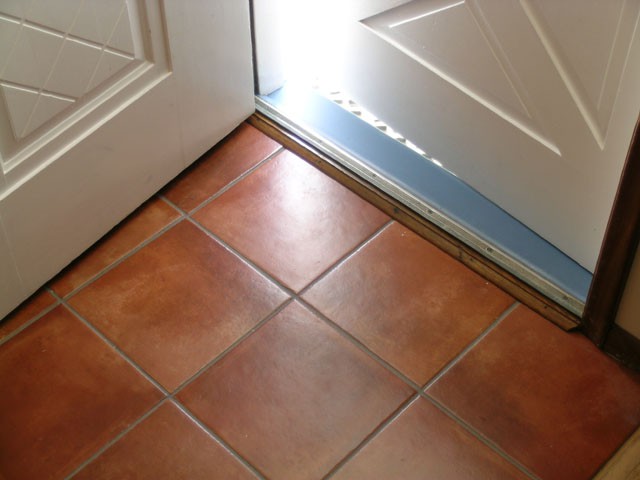 The tile is a little higher than the surrounding wood floors. This caused a little extra work on the front door threshold. I had to trim the underside, which I discovered was tapered. While we had it out (in order to lay the tile) Judy refinished it. It may need to be adjusted as the door sticks a little on one end, but for now, it is completed.
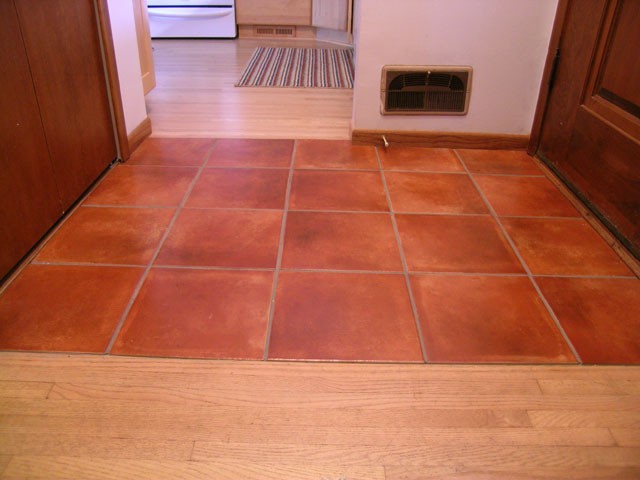 As the final step in the remodel is now finished, we deem our remodel to be complete. (I hope this doesn't mean we will be moving soon!) The kitchen and dining room served us well during the open house...
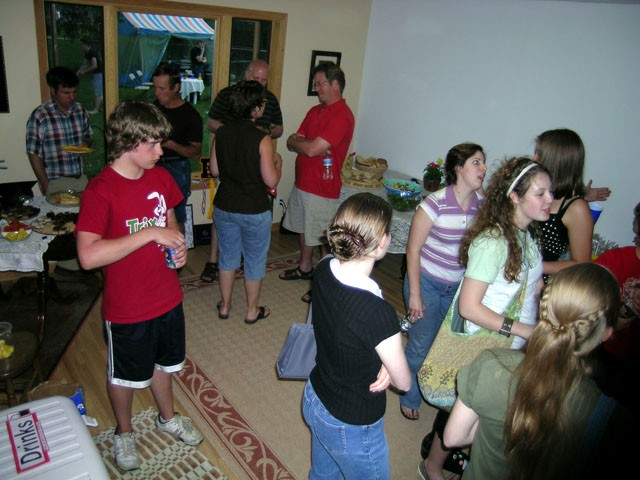 The dining room has plenty of, well, room. We set tables around the walls, and there was lots of space for guests to mingle and munch.
 As you can see, there is plenty of room for three or more adults working in concert, each with their own counter space, cutting board, and plenty of room to move around.
See Phase 1 here.


